Due to its static nature Jekyll has many deployment possibilities. I was interested to deploy Jekyll blog to GitHub Pages by using github-pages gem. The process of deploying a Jekyll site to gh-pages is like deploying any other static site. For that you create a project repo on GitHub, push all your project files to the master branch and then create a gh-pages branch. GitHub by default will automatically generate your static site directly from the gh-pages branch.
However, there are several steps which can’t be missed while deploying Jekyll:
- First of all, add gem 'github-pages' to a Gemfile. This gem is provided by GitHub and used to manage Jekyll and its dependencies on GitHub Pages.
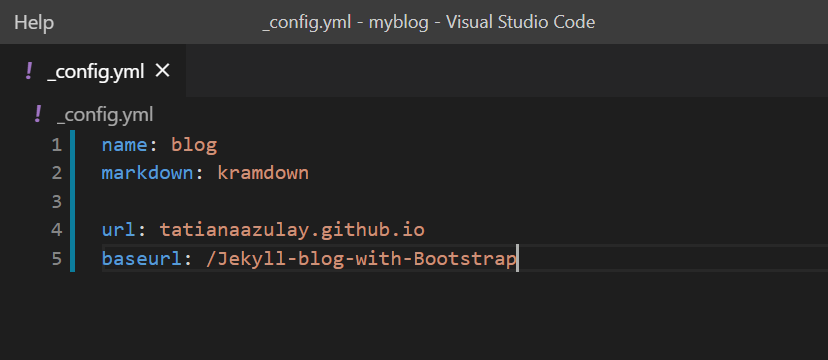
- Then we need to work on the project url structure and _config.yml file which tells Jekyll basic info about our project.
_CONFIG.YML
YAML is known as “a human-readable data-serialization language” which is used for configuration files and for storing or transmitting data.
Yaml uses maps (Hashes, Objects, Dictionaries), sequences (arrays, lists) and scalars (Strings, Numbers, Values).
The basic syntax and logic used by Yaml is the following:
- Key/value in a map is divided by the colon followed by a whitespace (space or newline)(: ).
- The value can be a scalar (string or number), map or a sequence.
- Sequences indicate each entry with a dash and space ( “- ”).
See the full YAML specification for more information.
Jekyll looks for .yml or .json files, another data serialization language, in _data folder under the main directory.
According to the described above Yaml syntax we should specify the following in our _config.yml:
url: [GITHUB ACCOUNT NAME]
baseurl: [REPO NAME]

As we set baseurl: /Jekyll-blog-with-Bootstrap, Jekyll considers /Jekyll-blog-with-Bootstrap/ as the root of the blog and will serve it locally at
http://localhost:4000//Jekyll-blog-with-Bootstrap /
As we set baseurl: /Jekyll-blog-with-Bootstrap, Jekyll considers /Jekyll-blog-with-Bootstrap/ as the root of the blog and will serve it locally at http://localhost:4000//Jekyll-blog-with-Bootstrap /
Now url and baseurl keys can be used for handling url paths inside the blog.
As Jekyll uses Liquid markup, so we need to use double curly braces to output content of our keys. We use double curly braces to reference info which is passed to the html.
Thus,to access styles.css file which is located in css folder under assets directory we need to prepend baseurl to its relative path
href="/blogging-with-Jekyll/assets/css/styles.css". We can also write it this way:
href="/blogging-with-Jekyll/assets/css/styles.css"
The result link will be
https://tatianaazulay.github.io/Jekyll-blog-with-Bootstrap/
Thus,to access styles.css file which is located in css folder under assets directory we need to prepend baseurl to its relative path href="/blogging-with-Jekyll/assets/css/styles.css". We can also write it this way:
href="/blogging-with-Jekyll/assets/css/styles.css"
The result link will be https://tatianaazulay.github.io/Jekyll-blog-with-Bootstrap/
Conclusion
Instead of using hard code links in the blog and write them in the source code, we implemented soft code links.
Yaml and Liquid markup used by Jekyll allows us to soft code links inside the blog which is extremely helpful when we move projects to different locations. The values of url and baseurl keys are defined in _config.yaml file and referenced with doble curly braces from different pages of the project. The same technique is also used in constructing dynamically generated links in dynamic website, as for example for soft coded links generated from a search result.
Yaml and Liquid markup used by Jekyll allows us to soft code links inside the blog which is extremely helpful when we move projects to different locations. The values of url and baseurl keys are defined in _config.yaml file and referenced with doble curly braces from different pages of the project. The same technique is also used in constructing dynamically generated links in dynamic website, as for example for soft coded links generated from a search result.